This recipe was submitted by one of our readers, just like you.
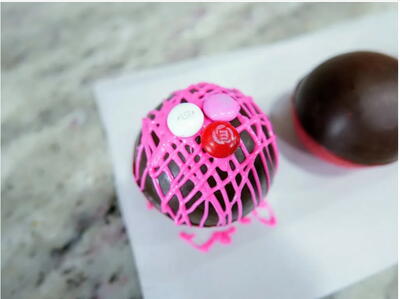
Valentine’s M&m Hot Chocolate Bomb Recipe

Valentines Mm Hot Chocolate Bomb Recipe
"These Valentine's M&M Hot Chocolate Bombs are the best gift to share this year. With a little pink drizzle and M&M's to top them off, these hot chocolate bombs are sure to win your Valentine over. With only 30 minutes prep time, they are also quick and easy to make! All you need is some tempered dark chocolate, sweet candy melts, hot chocolate mix, and Valentine themed M&M's. If you can resist making a cup of hot cocoa for yourself, wrap them up as the perfect Valentine's day gift. "
Serves3 people
Preparation Time30 min
Ingredients
- ⅔ cup red candy melts
- 3.5 oz dark chocolate, 72% cocoa
- ¼ cup bright pink candy melts
- 3 heaping tbsp hot chocolate mix
- 3 oz valentine’s M&M’s Milk Chocolate Candies
-
The first step in making these hot chocolate bombs is tempering your dark chocolate! Give the chocolate a rough chop and microwave it in a heat-safe bowl for 30 seconds at 50% power.
-
Stir the chocolate and start microwaving it 15-seconds at a time, being sure to stir after each microwaving.
-
When it starts to melt, begin checking the temperature with your candy thermometer. You want your chocolate melted, but you don’t want the temperature above 90 degrees. If it comes close but your chocolate still has chunks, give it a quick stir and it should all melt and become creamy.
-
Grab a baking sheet or other flat surface and place your silicone mold on it. Add about a tablespoon of the melted dark chocolate to 3 of the molds. Coat them completely, leaving the edges a little thicker than the bottom.
-
Move the molds to the fridge for 1-2 minutes to set, then remove and repeat the coating process a second time to make sure your sphere is thick enough to prevent breaking.
-
Move the molds to the fridge again to set.
-
Now it’s time to start on your other halves. Melt the red candy melts by adding them to a bowl and microwaving for 1 minute at 50% power. Stir them well and continue microwaving 30-seconds at a time until they are completely melted and creamy.
-
Take the molds out of the fridge and add about a tablespoon of the melts to the remaining cavities just like you did with the dark chocolate. Since the candy melts are thicker, you only need to coat these halves one time!
-
Transfer the molds in the fridge again for about 5-10 minutes until they are completely set.
-
Once they’re set, remove the molds from the fridge and carefully push the spheres out starting with the edges and pushing the middle out last.
-
Set your chocolate spheres aside on the baking sheet.
-
Heat a frying pan over medium heat. Once hot, place a red half edge-side down on the pan, twisting it a few times to melt the edges.
-
Immediately flip the sphere over and add to the center of it a heaping tablespoon of hot chocolate mix and 5-6 M&M’s.
-
Melt the edges of a dark chocolate sphere-half the same way and stick it right on top of the red half, twisting it to seal the sphere.
-
Repeat with the 2 other spheres and set them aside.
-
Melt the bright pink candy melts the same way as the red. Add the pink melted chocolate to a plastic storage bag and cut a hole in the corner of it.
-
Drizzle the chocolate back and forth on each of the hot chocolate bombs. Then add 3 M&M’s on top before the chocolate sets and you’re hot cocoa bombs are ready to go!
-
Tip 1: If your pink candy melt drizzle sets before you add the M&M’s on top and they won’t stick, don’t worry! It’s an easy fix. Just pipe a little chocolate right onto the M&M and use it like glue to stick it on! Make sure you give it a good press as well to stick it on tight.
-
Tip 2: It’s important to handle the hot chocolate bombs as little as possible to avoid getting any fingerprints on them. Your hands are warm so every time you pick up your spheres up you’ll risk melting them or even breaking them. If you really want the spheres to be nice and smooth, you can wear food-grade gloves!

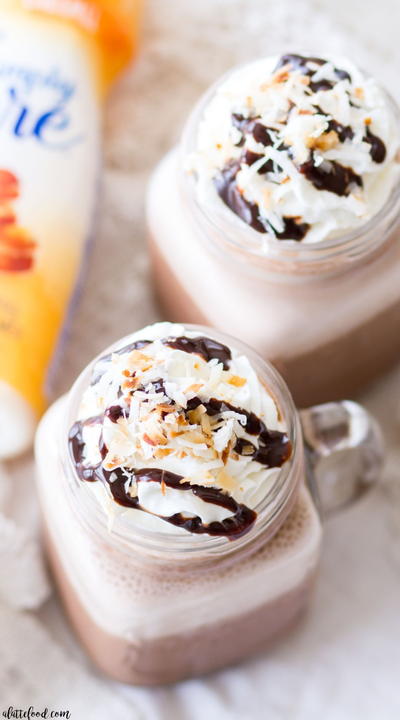
Read NextCaramel Mocha Coconut Frappe