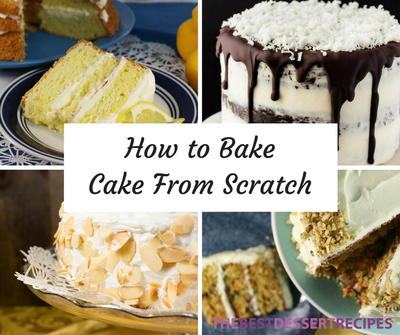
How to Make a Cake from Scratch: 9 Things You Should Know About Baking Cakes
Knowing the chemistry of cakes is the best way to make your cakes turn out perfectly every time!

Everyone knows how delicious and easy recipes with cake mix can be, but nothing can truly beat a fresh cake made from scratch! Baking a cake from scratch can actually be a lot easier than you might expect, and it is well worth the effort!
Here are some cake baking tips that you'll want to keep in mind no matter what type of cakes you're baking. These secrets of the baking trade can make the difference between a cake that is both moist and fluffy and a cake that's a dense, flavorless hockey puck.
1. Make Sure Your Ingredients Are Room Temperature
It really makes a difference. The temperature of your ingredients can affect how the batter turns out. This is especially true for eggs, butter, and other dairy products. When you see the baking instructions or ingredients list calls for something at room temperature (roughly 70 degrees F), don't just ignore it!
Room Temperature Eggs:
Letting your eggs sit in warm water for a few minutes will bring them to room temperature so that they will be easier to mix into the batter. This will save you the time of setting them out and waiting for them to warm up.
Room Temperature Butter:
You can microwave your butter to soften it, but we recommend letting it sit for 30 minutes or so before you start baking for best results. By putting butter in the microwave, you risk accidentally melting it. If you're impatient or short on time, you can cut the butter into cubes and leave them out for just 15-20 minutes.
2. How to Make Your Cakes Light and Fluffy
This is closely related to tip #1 about keeping your ingredients at room temperature. When you mix your wet ingredients together, they create an emulsion, and when these ingredients are at the proper temperature, there will be small bubbles of air that form in the batter. During the baking process, these bubbles will make your cake light and velvety.
It's important to not overmix your batter as well. Doing this can destroy those precious air bubbles.
While it's good to make your cakes light and fluffy, you don't want to make them dry either. To make your cakes moist but not thick and dense, you should start by creaming your fats (usually oil or butter) and your sugar together in a bowl. This helps the sugar spread evenly and dissolve into the batter, and it will add a little more air into the batter without the risk of overmixing.
Other fluffy cake baking hacks:
-Add 2 tablespoons of pudding mix to your batter.
-Replace two eggs with three egg whites.
-Beat your egg whites until they have stiff peaks, and then fold them into your batter.
-Replace all-purpose flour with cake flour.
-Replace milk with buttermilk, which has a higher acid content.
-Alternate adding dry and wet ingredients when combining.
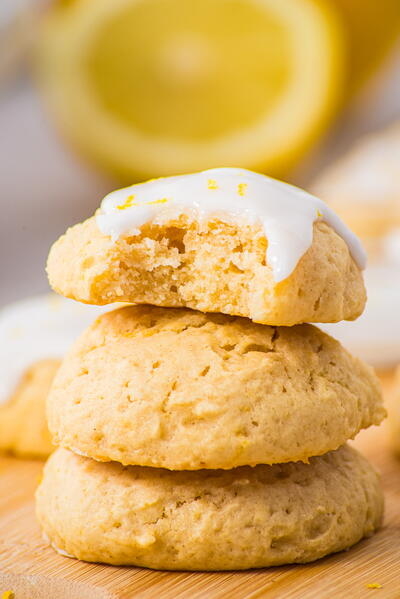
Try these tips and tricks out on this recipe for Italian Lemon Cream Cake below, and see the difference that it makes!

3. Properly Measure Your Dry Ingredients
The most common mistake people make when measuring dry ingredients is sticking the measuring cup straight in -- especially when measuring flour. We recommend you pour the flour into your cup or scoop it out using a spoon or scoop. This prevents the flour from being packed down, giving you more flour that you actually need.
Watch the Technique: How to Measure Dry Ingredients: The Scoop and Sweep Method
Many professional bakers swear that the best way to measure flour is to weigh it instead of using measuring cups, but measuring flour with cups can yield a fantastic cake, too. Using the measuring cup to scoop your ingredients can pack down the flour and give you more than you actually need. Properly measuring your dry ingredients will yield a smoother batter, free of flour clumps. You will also end up with a more velvety textured cake.
This is particularly important for cakes that need to be more dense and moist, like pound cakes or this Hummingbird Cake, shown below.

Remember: If the recipe asks for sifted flour, make sure to sift it because a cup of sifted flour is less than a non-sifted cup of flour. The way the recipe is written also makes a difference in how you should measure.
1 cup flour, sifted
Is not the same as
1 cup sifted flour
The first option means you should measure out a cup of flour and then sift it. The other option requires sifting flour into a 1 cup measuring up and ends up being a noticeably smaller amount of flour in the end. Sifting also removes clumps of flour and yields a smooth final cake!
4. Make Your Cakes Rise and Have Structure
Making your cakes rise is all in the chemistry of cakes. Small reactions between ingredients in the baking process add microscopic air bubbles in your cake, which add lift and structure to your cakes. This not only makes them more visiually appealing, but it also prevents you from ending up with a flat, dense cake. Below are the tips and tricks for making your cakes rise and have structure:
Make sure your baking powder and baking soda aren't expired. Baking soda and baking powder are possibly the most important ingredients when it comes to the chemistry of what makes your cakes work. If they're expired, the chemical reactions might fail in the oven, and they will not produce those extra air bubbles necessary to make the cake rise.
Structure is made in the oven. If your cake doesn't rise as much as you were expecting, it's probably because the oven was too hot. The hotter the oven is, the faster the batter will set, giving it less time for those chemical reactions to take place. But you shouldn't lower the temperature too much either. If the cake rises too much, you risk it collapsing.
Don't overstir your batter. Different batters require different stirring times. Pay attention to how long and how intensely you should be stirring your batter. Overstirring can result in a sinking cake.
Follow the recipe exactly. This might seem obvious, but not all recipes are equal, and for a good reason, especially when it comes to the eggs in your batter. Depending on the type of cake you are making, your egg whites and yolks might need to be mixed separately.
Don't open the oven door. This is probably the hardest rule of baking to follow. It's always tempting to opent that oven door to see how your cake is progressing, but fight that urge. If you open the door before the cake is ready, it could collapse, giving your a flat, dense cake.
This recipe for Mary Todd Lincoln Cake, shown below, is all about rise and structure. Give it a try, using these tips and tricks:

5. Get the Air Bubbles Out of Your Batter
Once you have the batter in the dish, drop the cake pan from a few inches above the counter a few times, or tap the sides of the pan. This will get rid of any air bubbles which could cause your cake to fall in the oven.
This is especially helpful later, when you start to decorate your cake. If your cake has collapsed and the top is uneven, it will be much harder to properly frost.
Note: These air bubbles are not the same air bubbles mentioned in tip #2 of this article. Those air bubbles are highly incorporated into the batter. These are bubbles are larger gaps in the batter that usually form when you pour the batter into the cake pan. If these bubbles collapse during the baking process, you'll end up with an oddly shaped cake!
6. Make Your Own Frosting!
Once your homemade cake is done, you may want to put your feet up and frost it with premade frosting from a can -- don't!
Let's be real: half of the reason you eat cake is for the frosting. So if you're making your cake from scratch, it makes sense to make the frosting from scratch, too.
And before you start making excuses about how difficult it is -- homemade frosting is so easy to make. You can whip something up while you're waiting for your cake to cool. The possibilities are endless. We even have a guide for How to Choose the Right Frosting!
7. How to Get Your Cakes to Bake Evenly
There are two things you should always do to make sure your cakes bake evenly:
-Rotate the pan: When the baking time is 2/3 finished, rotate your pan or, if you are baking 2 layers on different racks, switch racks. All ovens have hot spots, so rotating your cake will help it bake evenly.
-Place the cake in the exact center: This means both vertically and horizontally. This will ensure that no one side of your cake gets more direct heat than any other part.
8. How to Know When Your Cake Is Done
There are a few ways to know if your cake is done. It's important not to overbake your cakes. No one wants a dry or burnt cake!
The most popular method is the toothpick method. Just take a toothpick, stick it into the center of the cake, and then pull it back out. If the toothpick comes out clean, your cake is ready to go.
You can also go the safe route and just use a thermometer straight into the middle of your cake to measure the internal temperature.
Another easy way to tell if your cake is done is to gently press the top of the cake. If the cake springs back, it's done baking.
9. Crumb Coating (and Why Should You Do It)
Crumb coating is simply a thin layer of frosting that you put on your cake before you actually frost it. The purpose of it is to catch any crumbs that might come off the cake and show up on the outside of your frosting.
Just wait until the cake cools, and spread around a very thin layer of frosting. Since it isn't the layer of frosting that people will see, it doesn't have to be pretty! Plus, it will make adding that top layer of frosting even easier.
Have a cake baking tip you'd like to share?
Let us know in the comments!
Your Recently Viewed Recipes
Thanks for your comment. Don't forget to share!
Eugenia
Feb 23, 2018
An important tip I learned the hard way is to let your cake cool completely before frosting. Otherwise, it just starts melting all over your cake or worse, your cake starts to crumble!
nataliegrace
Aug 09, 2017
I had no idea about the difference between 1 cup of sifted flour vs. 1 cup of flour, sifted! Honestly I always skip the sifting step, but I know I shouldn't since it makes such a difference.
Mark
May 23, 2017
This is super handy! I'll definitely be saving this page for the next time I'm in the mood to bake
Report Inappropriate Comment
Are you sure you would like to report this comment? It will be flagged for our moderators to take action.
Thank you for taking the time to improve the content on our site.